
第1页 / 共8页
试读已结束,还剩7页,您可下载完整版后进行离线阅读
THE END
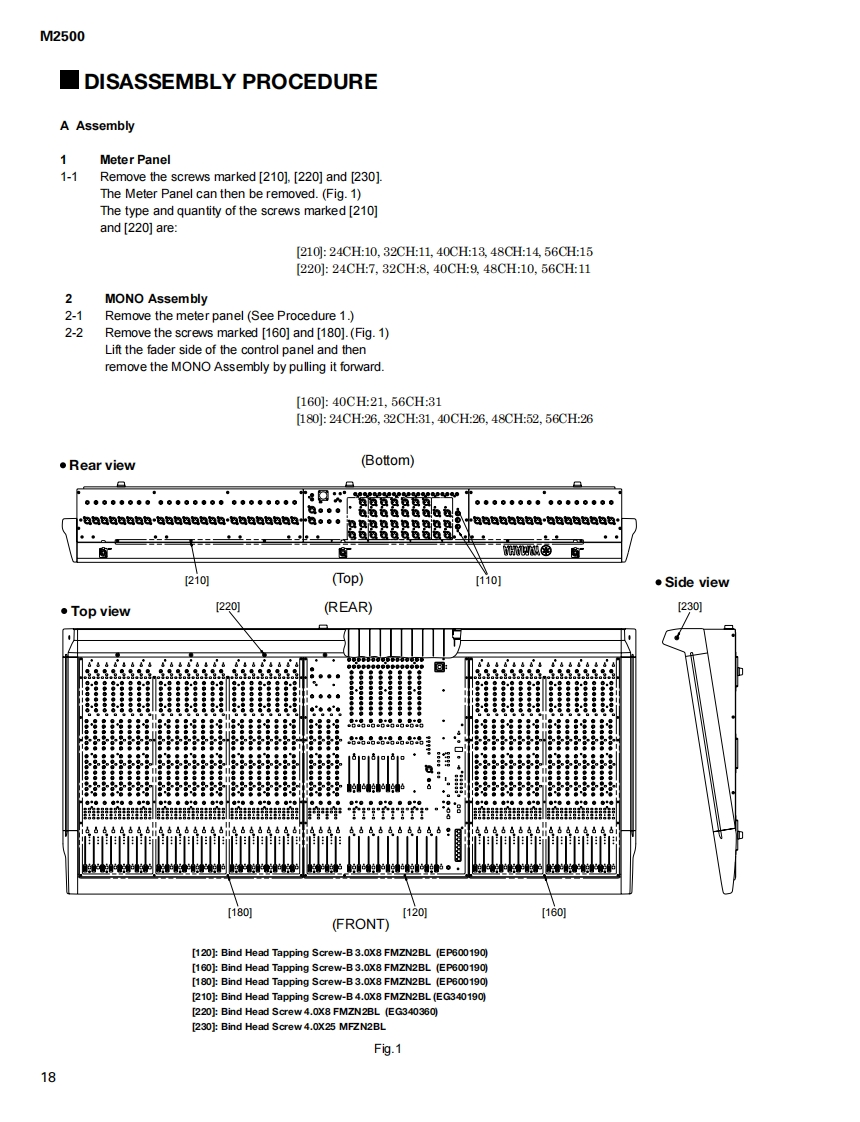
M2500DISASSEMBLY PROCEDUREA Assembly1Meter Panel1-1Remove the screws marked [210].[220]and [230]The Meter Panel can then be removed.(Fig.1)The type and quantity of the screws marked [210]and [220]are:[210:24CH:10,32CH:11,40CH:13.48CH:14,56H:15[220:24CH7,32CH:8,40CH:9,48CH:10,56CH112MONO Assembly2-1Remove the meter panel(See Procedure 1.)2-2Remove the screws marked [160]and [180].(Fig.1)Lift the fader side of the control panel and thenremove the MONO Assembly by pulling it forward.[160:40CH:21,56CH:31[180小:24CH26,32CH31,40CH26,48CH52,56CH:26●Rear view(Bottom)口。00●●●●00e00●●0●p●p●9p090g9905●●9●●009pa。。。色色也包a色色色色色也色包四色包a色也色包因十色··●酒aaaaanab中色色也色ae色包色色也色色色色”网金[210](Top)[110]●Side view。Top view[220(REAR)[230]品品品品0品品0品子[180][120][160](FRONT)[120]:Bind Head Tapping Screw-B3.0X8 FMZN2BL (EP600190)[160]:Bind Head Tapping Screw-B 3.0X8 FMZN2BL (EP600190)[180]:Bind Head Tapping Screw-B 3.0X8 FMZN2BL (EP600190)[210]:Bind Head Tapping Screw-B 4.0X8 FMZN2BL (EG340190)[220]:Bind Head Screw 4.0X8 FMZN2BL (EG340360)[230]:Bind Head Screw 4.0X25 MFZN2BLFig.118

请登录后查看评论内容