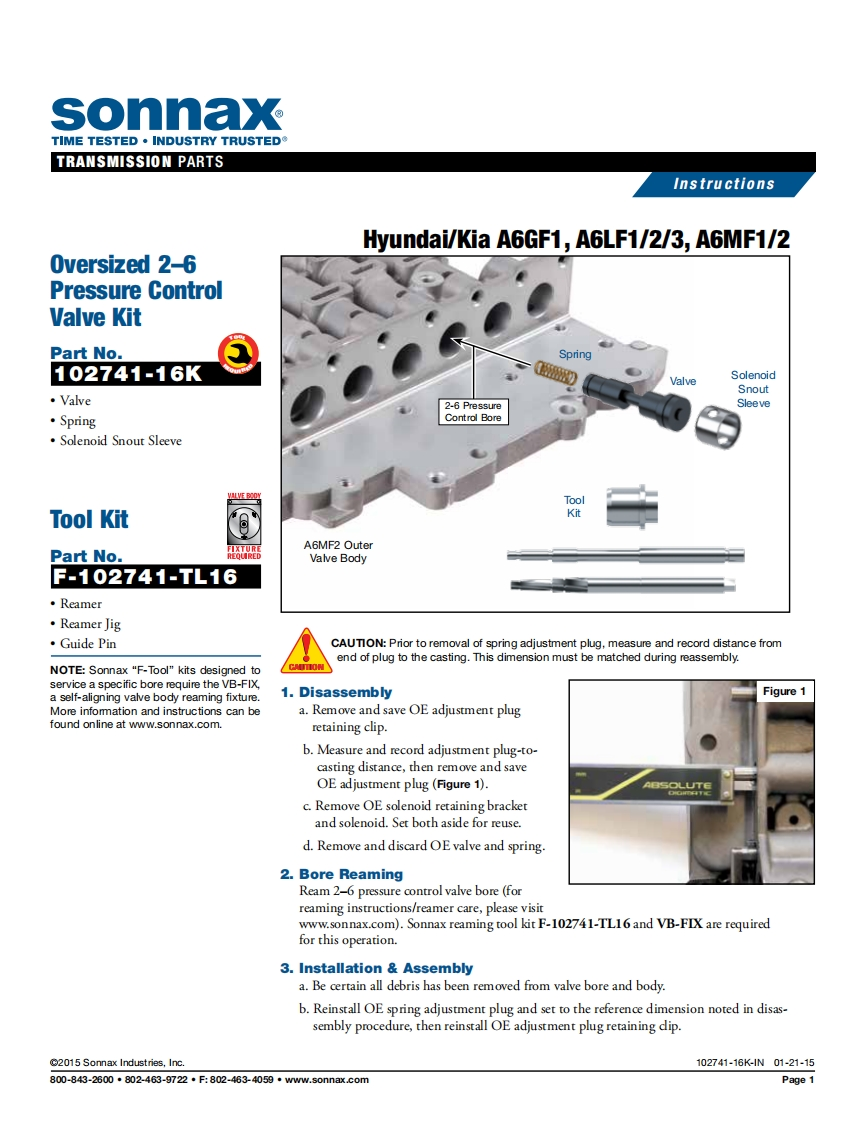
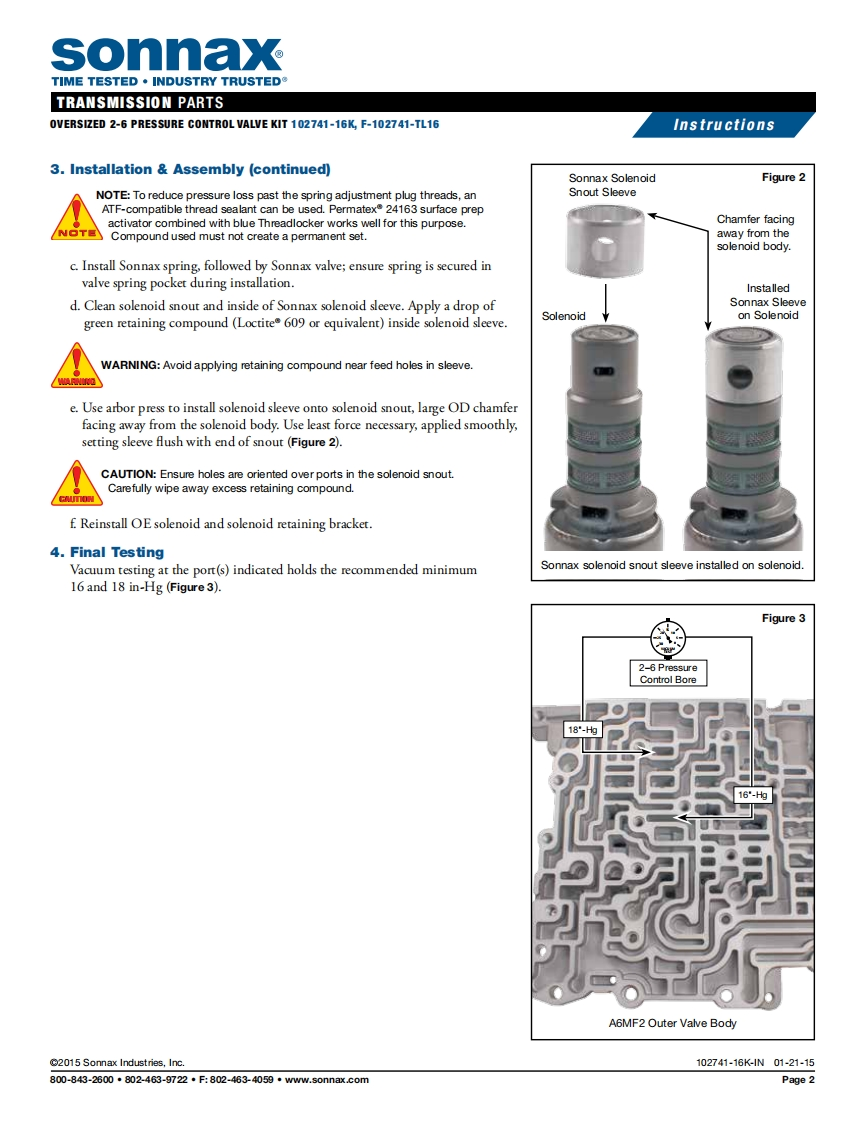
sonnaxTIME TESTED.INDUSTRY TRUSTEDTRANSMISSION PARTSInstructionsHyundai/Kia A6GF1,A6LF1/2/3,A6MF1/2Oversized 2-6Pressure ControlValve KitPart No.Spring102741-16KSolenoidSnout·Vave2-6 PressureSleeve·SpringControl BoreSolenoid Snout SleeveTool KitKitPart No.哥A6MF2 OuterValve BodyF-102741-TL16·Reamer·Reamer Jig。Guide PinCAUTON:Prior to removal of spring adjustment plug,measure and record distance fromend of plug to the casting.This dimension must be matched during reassembly.NOTE:Sonnax "F-Tool"kits designed toservice a specific bore require the VB-FIX,a self-aligning valve body reaming fixture.1.DisassemblyFigure 1More infomation and instructions can bea.Remove and save OE adjustment plugfound online at www.sonnax.com.retaining clip.b.Measure and record adjustment plug-to-casting distance,then remove and saveOE adjustment plug (Figure 1).ABSOLUT限c.Remove OE solenoid retaining bracketand solenoid.Set both aside for reuse.d.Remove and discard OE valve and spring.2.Bore ReamingReam 2-6 pressure control valve bore (forreaming instructions/reamer care,please visitwww.sonnax.com).Sonnax reaming tool kit F-102741-TL16 and VB-FIX are requiredfor this operation.3.Installation Assemblya.Be certain all debris has been removed from valve bore and body.b.Reinstall OE spring adjustment plug and set to the reference dimension noted in disas-sembly procedure,then reinstall OE adjustment plug retaining dip.2015 Sonnax Industries,Inc.102741-16K-N01-21-15800-843-2600·802-463-9722·F:802-4634059·www.50nnax.comPage 1


请登录后查看评论内容