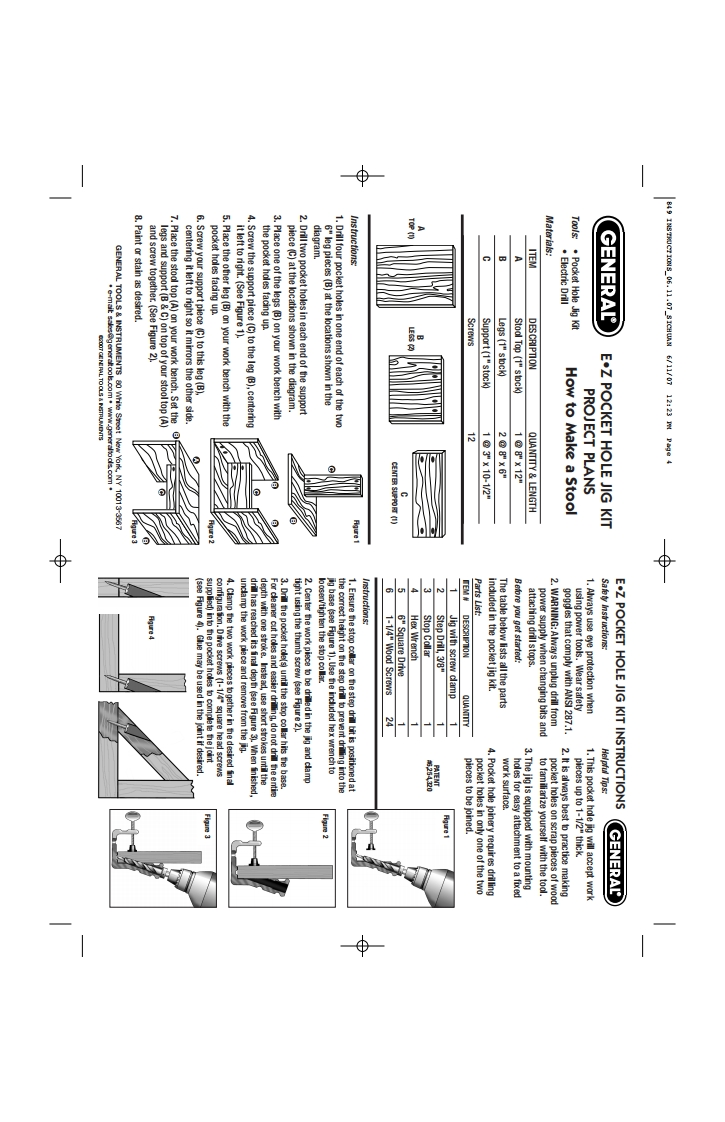
8.Paint or stain as desired.Materials:and screw together.(See Figure 2).diagram.legs and support (B C)on top of your stool top (A)7.Place the stool top (A)on your work bench.Set the6.Screw your support piece (C)to this leg (B),pocket holes facing up.5.Place the other leg (B)on your work bench with theit left to right.(See Figure 1).the pocket holes facing up.3.Place one of the legs (B)on your work bench withInstructions:ITEMcentering it left to right so it mirrors the other side.4.Screw the support piece (C)to the leg (B),centering6"leg pieces (B)at the locations shown in theElectric DrillTools:.Pocket Hole Jig KitGENERALScrewsSupport(1"stock)Legs (1"stock)Stool Top (1"stock)忘1e30x1012288x6m1e世X122QUANTITY LENGTHHow to Make a StoolPROJECT PLANSE·E(s88 Hgure 41.4mp the3.Drill the po1.Ensure he stop colParts List:Hex WrenchB6fore you det start6d.Sa SaGlue may be used in the joint if desired.supplied)in to the pocket holes to comple te the jointuncamp the work piece and remove from the ig.drill has reached its final depth (see Figure 3).When finisheddepth with one stroke.Inste ad,use short strokes until thecket the stop olar hits2.Center the work piece to be drilled in the ig and clamploosen/tighten the stop collar.ig base (see Figure 1).Use the included hex wrench tothe correct height on the step dn1-1/4"Wood Screws6"Square DriveS100D1308Jig with screw clampincluded in the pocket jigkitThe table below lists all the parts2.WARNING:Alays unplug drill fromgoggles that comply with ANSI 287.1.using power tools.Wear safety1.Always use eye protection whento prevent dnling into theE.Z POCKET HOLE JIG KIT INSTRUCTIONS4.Pocket hole joinery requires drillingpocket hoes in onynef theopieces to be joined.work surface.hn对时ho ho3.The jig is equipped with mountingp0电C电po po2.I is best o practice makingpieces up to 1-1/2"thick.1.This pocket hole jig will accept workHelpfu Tips:GENERAL


请登录后查看评论内容