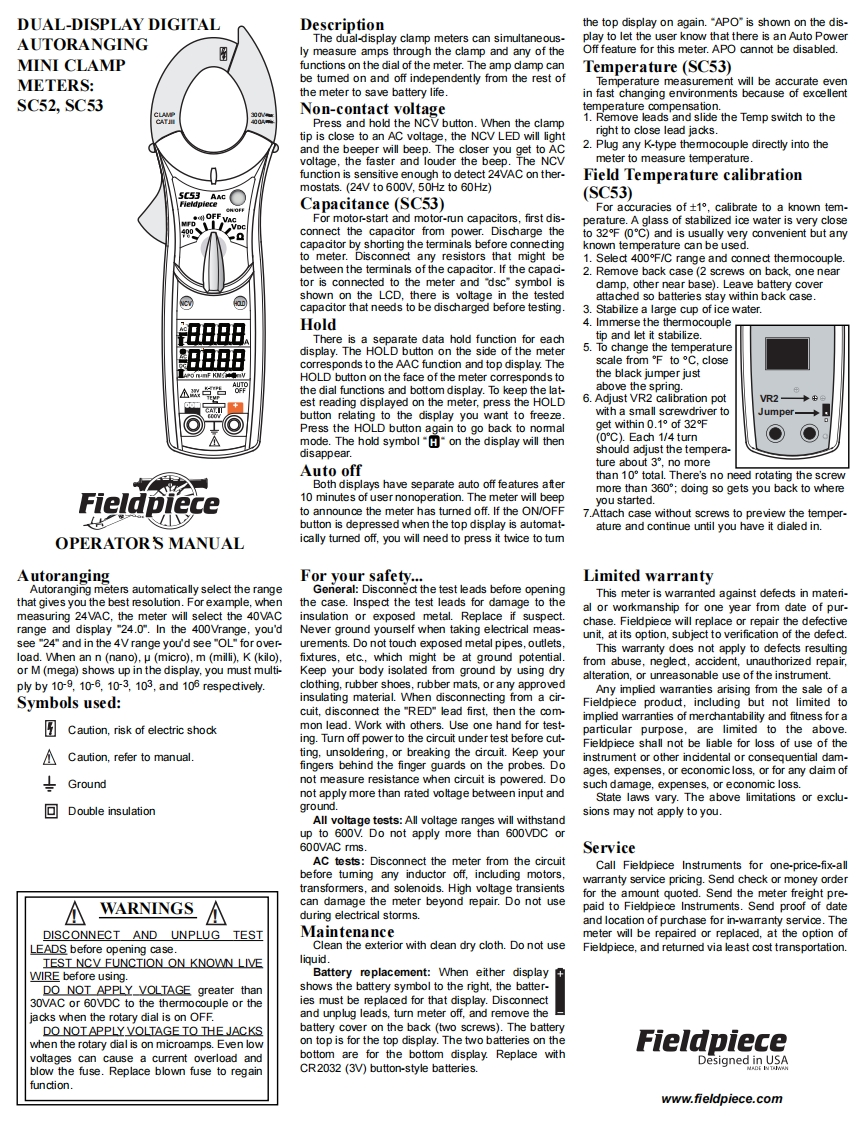
DUAL-DISPLAY DIGITALDescriptionthe top display on again."APO"is shown on the dis-AUTORANGINGThe dual-display clamp meters can simultaneous-play to let the user know that there is an Auto Powerly measure amps through the clamp and amy of theOff feature for this meter.APO cannot be disabled.MINI CLAMPfunctions on the dial of the meter.The amp clamp canTemperature(SC53)METERS:be tumed on and off independently from the rest ofTemperature measurement will be accurate eventhe meter to save battery lifein fast changing environments because of excellentSC52,SC53Non-contact voltagetemperature compensation.Press and hold the NCV button.When the clamp1.Remove leads and slide the Temp switch to thetip is close to an AC voltage,the NCV LED will lightright to close lead jacks.and the beeper will beep.The closer you get to AC2.Plug any K-type themocouple directly into thevoltage,the faster and louder the beep.The NCVmeter to measure temperature.function is sensitive enough to detect 24VAC on ther-Field Temperature calibrationmostats.(24V to 600V.50Hz to 60Hz)(SC53)Capacitance (SC53)For accuracies of +1,calibrate to a known tem-For motor-start and motor-run capacitors,first dis-perature.A glass of stabilized ice water is very closeconnect the capacitor from power.Discharge theto 32F (0C)and is usually very convenient but amycapacitor by shorting the terminals before connectingknown temperature can be used.to meter.Disconnect any resistors that might be1.Select 400F/C range and connect themocouple.between the terminals of the capacitor.If the capaci-2.Remove back case(2 screws on back,one neartor is connected to the meter and dsc"symbol isdlamp,other near base).Leave battery covershown on the LCD,there is voltage in the testedattached so batteries stay within back case.capacitor that needs to be discharged before testing.3.Stabilize a large cup of ice water.部BBBHold4.Immerse the thermocoupleThere is a separate data hold function for eachtip and let it stabilize.display.The HOLD button on the side of the meter5.To change the temperaturecorresponds to the AAC function and top display.Thescale from F to C.closeHOLD button on the face of the meter corresponds tothe black jumper justthe dial functions and bottom display.To keep the lat-above the spring.est reading displayed on the meter.press the HOLD6.Adjust VR2 calibration potVR2◆出button relating to the display you want to freeze.with a small screwdriver toJumper-Press the HOLD button again to go back to nommalget within 0.1 of 32Fmode.The hold symbol ""on the display will then(OC).Each 1/4 turndisappear.should adjust the tempera-ture about3°,no moreAuto offthan 10 total.There's no need rotating the screwBoth displays have separate auto off features aftermore than360°:doing so gets you back to whereField10 minutes of user nonoperation.The meter will beepyou started.to announce the meter has turned off.If the ON/OFF7.Attach case without screws to preview the temper-button is depressed when the top display is automat-

请登录后查看评论内容