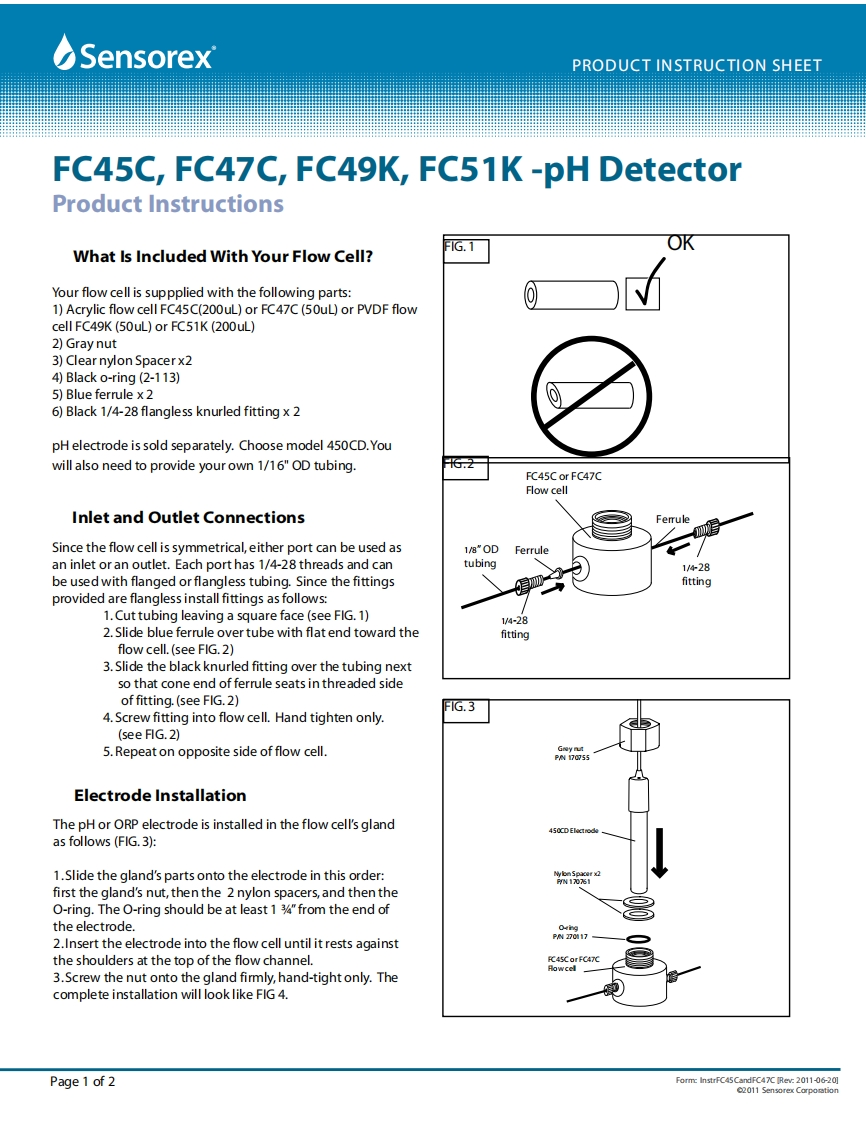
☑SensorexPRODUCT INSTRUCTION SHEETFC45C,FC47C,FC49K,FC51K-pH DetectorProduct Instructions1G.1What Is Included With Your Flow Cell?Your flow cell is suppplied with the following parts:1)Acrylic flow cell FC45C(200uL)or FC47C(50uL)or PVDF flowcell FC49K (50uL)or FC51K(200uL)2)Gray nut3)Clear nylon Spacerx24)Black o-ring (2-113)5)Blue ferrule x 26)Black 1/4-28 flangless knurled fitting x 2pH electrode is sold separately.Choose model 450CD.Youwill also need to provide your own 1/16"OD tubing.G.2FC45C or FC47CFlow cellInlet and Outlet ConnectionsFerruleSince the flow cell is symmetrical,either port can be used as18"0DFerrulean inlet or an outlet.Each port has 1/4-28 threads and cantubing1/428be used with flanged or flangless tubing.Since the fittingsfittingprovided are flangless install fittings as follows:1.Cut tubing leaving a square face(see FIG.1)1/4-282.Slide blue ferrule over tube with flat end toward thefittingflow cell.(see FIG.2)3.Slide the black knurled fitting over the tubing nextso that cone end of ferrule seats in threaded sideof fitting.(see FIG.2)FIG.34.Screw fitting into flow cell.Hand tighten only.(see FIG.2)5.Repeat on opposite side of flow cell.GNy tP/N 10755Electrode InstallationThe pH or ORP electrode is installed in the flow cell's glandas follows (FIG.3):1.Slide the gland's parts onto the electrode in this order:83Tr0first the gland's nut,then the 2 nylon spacers,and then theO-ring.The O-ring should be at least 1 3"from the end ofthe electrode.2.Insert the electrode into the flow cell until it rests againstthe shoulders at the top of the flow channel.FC4SCorFC47C3.Screw the nut onto the gland fimmly,hand-tight only.Thecomplete installation will look like FIG 4.Page 1 of 2Form:InstrFC45CandFC47C [Rev:2011-06-20]2011 Sensorex Corportion

请登录后查看评论内容