
第1页 / 共13页
试读已结束,还剩12页,您可下载完整版后进行离线阅读
THE END
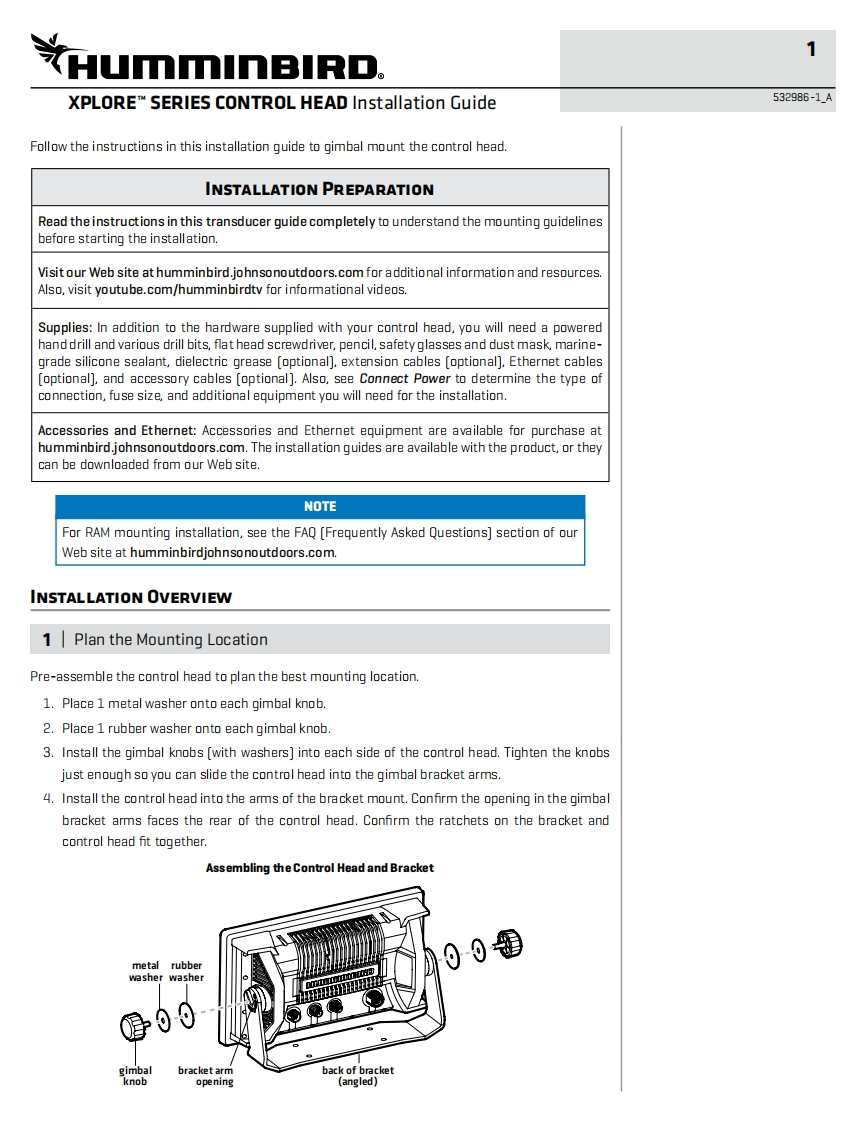
文umminBIRD.XPLORET SERIES CONTROL HEAD Installation Guide532986-1AFollow the instructions in this installation guide to gimbal mount the control head.INSTALLATION PREPARATIONRead the instructions in this transducer guide completely to understand the mounting guidelinesbefore starting the installation.Visit our Web site at humminbird.johnsonoutdoors.com for additional information and resources.Also,visit youtube.com/humminbirdtv for informational videos.Supplies:In addition to the hardware supplied with your control head,you will need a poweredhand drill and various drill bits,flat head screwdriver,pencil,safety glasses and dust mask,marine-grade silicone sealant,dielectric grease [optional].extension cables [optional].Ethernet cables[optional],and accessory cables [optional].Also,see Connect Power to determine the type ofconnection,fuse size,and additional equipment you will need for the installation.Accessories and Ethernet:Accessories and Ethernet equipment are available for purchase athumminbird.johnsonoutdoors.com.The installation guides are available with the product,or theycan be downloaded from our Web site.NOTEFor RAM mounting installation,see the FAQ [Frequently Asked Questions]section of ourWeb site at humminbirdjohnsonoutdoors.com.INSTALLATION OVERVIEW1Plan the Mounting LocationPre-assemble the control head to plan the best mounting location.1.Place 1 metal washer onto each gimbal knob.2.Place 1 rubber washer onto each gimbal knob.3.Install the gimbal knobs (with washers]into each side of the control head.Tighten the knobsjust enough so you can slide the control head into the gimbal bracket arms.4.Install the control head into the arms of the bracket mount.Confirm the opening in the gimbalbracket arms faces the rear of the control head.Confirm the ratchets on the bracket andcontrol head fit together.Assembling the Control Head and Bracketmetal rubber00washer washergimbalbracket armback of bracketknobopening(angled)

请登录后查看评论内容